
We’ve written before how everything we do is open from day one. One of the ways we do that is by building all of our products—from our blog and our dashboard to a new website for the Peace Corps’ Let Girls Learn Initiative—using GitHub. We do this so that the public can see the code we’re working on, offer feedback, and copy or fork that code for their own projects. If you’ve never used GitHub before, it can be a little intimidating, so we’d like to share the tutorial our own new employees use when they start with 18F.
We hire people from many different backgrounds and each new employee brings a different level of comfort with the specific tools we use on our various projects. The team that runs the 18F website recently started writing down the tools and processes that we use to update the blog and the code that runs the site.
Because some of the people we hire have never used these tools before, this guide assumes you have no prior knowledge of them either. We’re going to introduce you to GitHub, the command line (also called Terminal on OS X), and Markdown through a guided exercise. Today you’ll learn how to make a blog post on the 18F blog.
Every step will be illustrated with a helpful screenshot or animated GIF that shows you exactly what your screen should look like. We’ll go through each step in order. At the end of this post, you will know how to:
- Turn Your Mac Into a Web Development Machine
- Get Started With GitHub and the Terminal
- Clone a Repo on Your Computer
- Build the 18F Site
- Create a Branch
- Edit and Commit a Blog Post
- Add Front Matter
- Learn How to Make a Pull Request
It is worth noting: There are many different ways to do each of these steps. For example, there are apps for using Git like GitHub for Mac and Windows, or Tower; dozens of different text editors; and competitors to GitHub like Bitbucket, or SourceForge. You might explore those on your own. This post is a tutorial meant to prepare people to work with 18F’s Website team.
If you have an alternative way of doing any of these steps — or have ways to make this more efficient — please let us know by posting an issue here. (You don’t have to know how to code to post an issue, but you do need a GitHub account.)
What you need to get started: a GitHub account and Mac OS X. These instructions are primarily for Macs, but most of the instructions will work the same on a Linux computer. If you are working on Windows, we suggest checking out this comment that was posted to GitHub that details how to make these instructions work for Windows machines.
Turn your Mac into a web development machine
Using Linux? You can skip this section.
Our colleague Moncef Belyamani wrote a script which turns your Mac into a web development machine in about 15 minutes. You will be asked to enter your computer’s password three different times during the installation. The terminal doesn’t provide any feedback when you type in your password. Just type it in and press enter.
If you’d rather not use the script, you can also follow the detailed instructions he wrote on his website. Or follow along with this video he prepared with step by step instructions to turn your Mac into a web development machine. To use the script, follow the instructions in text below:
- Activate terminal by pressing command + space and then typing “Terminal” in the search field.
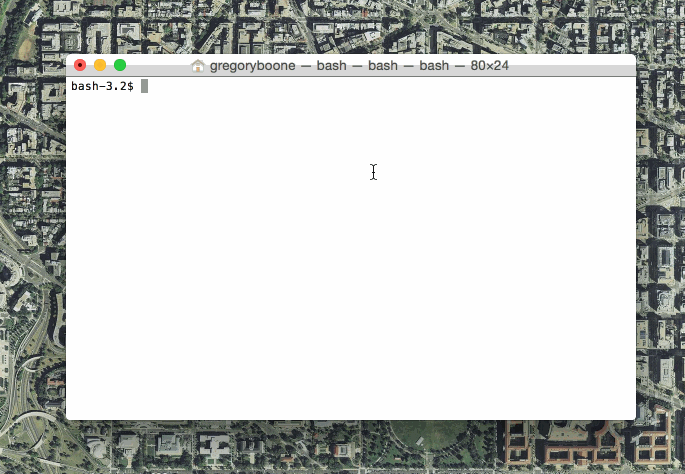
The terminal icon looks like this:
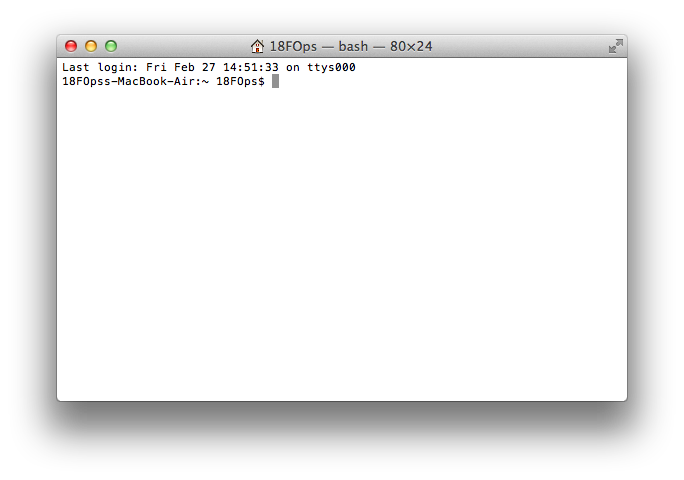
And you should have a window like this when you open it:
-
Go to Terminal and paste the following
curl --remote-name https://raw.githubusercontent.com/18F/laptop/master/macand press enter. -
Then paste
bash mac 2>&1 | tee ~/laptop.log && source ~/.rvm/scripts/rvmand press enter. This sets up all of the software you need in order to manage the languages we use at 18F. (For a full list of programs, click here).
Getting started With GitHub and the Terminal
Terminal is a program that lets you send commands to your computer, and the text you pasted above is an example of how those commands work. In this guide, whenever you see text that looks like
this, you’re reading a command. Type the commands exactly as you see them here (or copy and paste them into your Terminal) and always press return at the end.
You’re going to see the word “directory” a lot in this tutorial. Directory is another word for folder. Directories are specific locations for files on your computer, and the Terminal always takes commands starting from a directory. If we say we are “working in a directory” it means the terminal is starting from that location. Let’s play around with directories a bit:
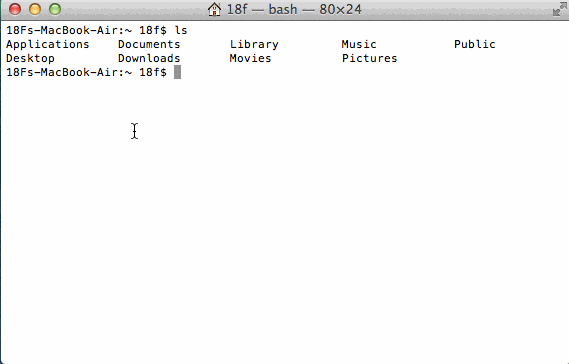
- Type
ls: this will show you everything in the directory where you are currently located. If you typels -1it will list them all in a single column for you.lsstands for “list” and the-1tells your computer to list the directory in one column. If you are in your home directory, you will probably see a list in Terminal similar to this screenshot:
- Now type
cd Documents: this will take you into your Documents directory, if that was one of the options shown when you used the ‘ls’ command above.cdstands for “change directory.” - Type
ls -1again to see all the files inside your Documents directory. - Type
ls -1F: notice a difference? Any item in the list with a/at the end is another directory. - Type
cd ..to go back one directory. Directories stack on top of one another and the directory “above” your current directory is always called.. - Type
pwd: this command shows you the directory you are currently working in.pwdstands for “print working directory.” You should see something that starts with/Users/, followed by your computer username. This is called your home directory and you can always get here by typingcd ~.
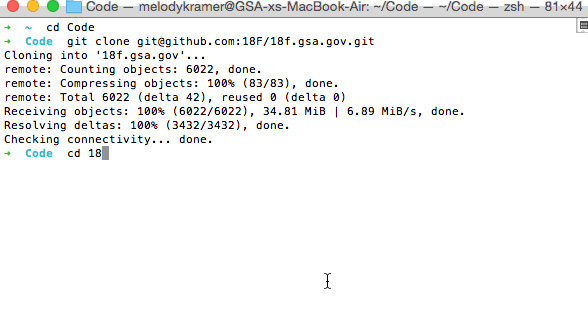
I like to put all my GitHub projects in the same directory. So the first thing I do is create a directory called “code”:
cd ~to make sure you’re in your home directorymkdir code: to create the directory calledcodein your home directory.mkdirstands for Make directory.cd codeshould bring your terminal into your code directory.
Pro tip: You can always get back to your code directory by typing
cd ~/code
Clone a repo on your computer
- First, you want to log into GitHub. Go to https://github.com/login and sign in with your username and password.
Now we can start working with the website. GitHub is a system that stores files and records changes made to them using a piece of software called Git, which allows multiple people to make separate changes to a program at the same time without getting in each others’ way. If our program was a five paragraph essay, Git allows Corey to edit the introduction on one computer while Jesse edits the conclusion somewhere else. When both are done, they can move their edits into one copy while preserving the changes from each person.
If you’ve ever used “Track Changes” in word processing (where edits are highlighted to be approved or rejected), Git is like that, but with many more features. In software development, Git and other version control tools are helpful when looking for the origin of a bug. Let’s say that some code isn’t working, but 15 people made edits to it in the last week and you aren’t sure where the bug is. With Git, you can load an old version of a program, test for the issue, and then “jump forward” through people’s edits until you find the first one that also has the problem. That tells you the specific edit to search for the mistake.
GitHub is a website that shows information from Git. For example, this link shows a spelling edit to this post by Melody. It also allows easy discussion about proposed changes, or for people who don’t have edit access to write-up problems they see as “issues.” Here is an issue thread that we made specifically for comments on this post!
In this section you’ll see the words “clone,” “repository,” and its shortened form, “repo.” Every project on GitHub is called a “repository” or a “repo;” you can see 18F’s list of repos at this link. A repo contains the entire history of the project with pointers called “commits” represented by “SHAs” that indicate when and where every file was changed, and how exactly it changed. When you “clone” a repo, you download the entire project plus its history to your computer. Once you have a project cloned, you can make changes on your computer without affecting the project as it exists on GitHub.
In this step we are going to clone the 18f.gsa.gov project to your computer.
- Type in
cd ~/codeand press enter to get to thecodedirectory we created earlier.
- Go to 18f.gsa.gov’s GitHub page and look on the right side of the page, under the links for “Issues” and “Graphs.” You’ll see it says “You can clone with HTTPS, SSH, or Subversion.” Click on the SSH link and copy the URL (web address) that’s in that text box to your clipboard.
If you are not on the 18F team but following these directions, you will need to “fork” this repo in order to follow the rest of the steps below. You can fork this repo by visiting: https://github.com/18F/18f.gsa.gov/fork/. Then, use the SSH link for your fork instead of the one above. GitHub’s documentation has more information about forks and how to use them.
- Type in
git cloneand then paste the URL that you copied to your clipboard. This is now copying the 18f.gsa.gov repo to your local computer.
If you run into an error here and have run the Laptop script, you need to open and register your GitHub desktop application. The script installs the application, but the application will not auto-generate an SSH key until you log-in with your 18F GitHub account credentials. Just open GitHub desktop and it will guide you as a first time user. You’ll validate your local computer with 2FA and then check a few more boxes. After completing that, re-try the
git clone [url]command.
If you run into an error here and you haven’t used the Laptop script mentioned above, you need to create what’s called an SSH key. You can follow the instructions that are located here. (Pro Tip: You type in everything except the
$.) You only have to do this once. An SSH key is a small file that sits on your computer and tells GitHub who you are. It’s kind of like a password your computer types in for you automatically. Every time you use this computer to clone a project or pull/push a project, this SSH key will get used. You will have to do this on every computer you have. So, if you plan to work on these projects on a separate computer, you will need to do this process again.
Branching and pull requests
Let’s go back to the 18f.gsa.gov repo from your web browser.
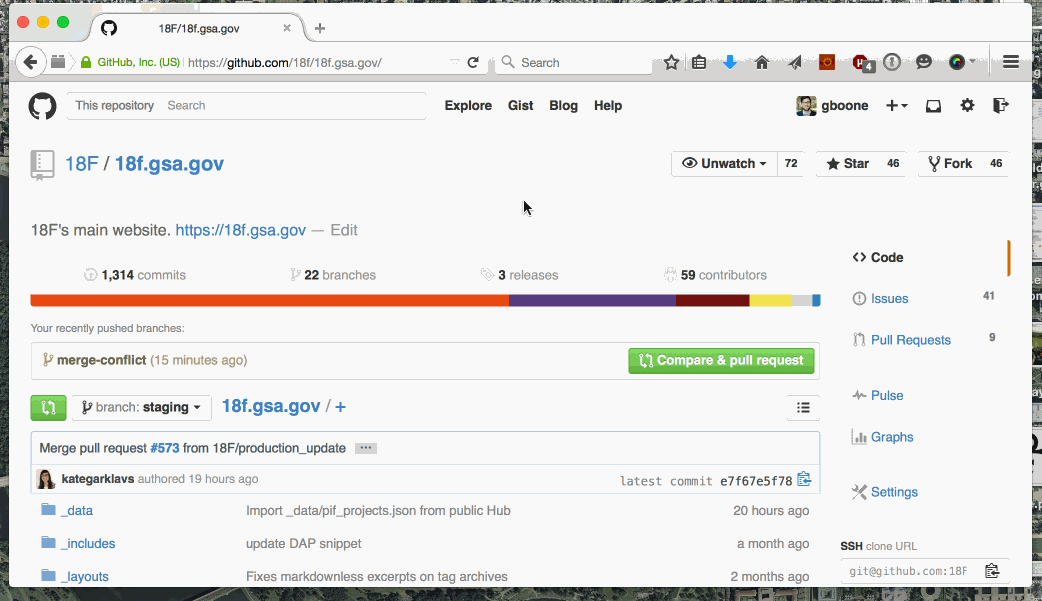
On this page you will see a list of files and folders in this project. All of the blog posts are in a folder called _posts. All of the pages are in a directory called _pages. There’s a readme that explains to anyone browsing 18F’s 18f.gsa.gov GitHub repo how some of this works. At the top of that window, you can see a dropdown that says “branch: staging.”
You are seeing on the website is another view of files and folders as shown here:
If you click on the branch:staging button, you can see a list of all of the “branches” that exist on this project. Every time you come directly to 18f.gsa.gov, it will show you the staging branch because we’ve made that branch the default.
Branches are little sandboxes for other people working on the project to prepare contributions without interfering with the main project. When you’re finished prepping, you issue something called a “pull request” from your branch to another. Usually we issue pull requests to the default branch. This opens a conversation about your contribution and if the team decides it’s okay, we will “merge” the pull request and include your work. The default branch on 18f.gsa.gov is “staging.” In other projects, you might see it called “master.”
In the next step we’re going to create a branch, and later on, when you make a pull request, GitHub will automatically assume you’re trying to contribute to the staging branch.
On the right side, you can also see a list of the existing pull requests and issues. All of the pull requests go to the staging branch. When we merge the pull request to the staging branch, GitHub automatically brings those changes into the project, but does not make them live on https://18f.gsa.gov yet.
In Terminal, enter the following commands:
cd 18f.gsa.govto change directories to18f.gsa.gov.ls -1Fto see all of the files and folders in the GitHub repo, just as you saw them on GitHubgit status
This last command will show you a little bit of information about what you’re working on right now. Let’s take this apart line by line:
- “On branch staging” tells you what branch you are currently working on (remember it’s
stagingby default). If you made any changes and commited them, you’d commit them to thestagingbranch. - “Your branch is up-to-date with ‘origin/staging’“ means your branch is up to date with the staging branch of the remote location called “origin.” A Git repo can have any number of remote locations it can interact with, called “remotes”. By default, when you clone a GitHub repo, a remote called “origin” is created that points to the repo on the GitHub website. To view your repo’s remote names and their location, type
git remote -v. The name “origin” is arbitrary. You could rename it to “github” if you wanted to, but we won’t do that now. - “Nothing to commit / working directory clean” means you’re completely up to date and haven’t made any changes.
Build the 18F site
Let’s go ahead and get you ready to build the site.
- You can do that by typing
./go init.
This command runs a bunch of commands in the background that you don’t need to worry about. It’s downloading and installing a few things called “gems.” Gems are little bundles of programs written in the Ruby programming language that do really specific things. Jekyll is a gem we use to create the 18f.gsa.gov website, and our version of it needs to use a few other gems to run and make the site work. The last thing it does is build the site out for you. You should only need to do this once.
“Building” the site is a process where Jekyll takes all the information in the 18f.gsa.gov directory and creates webpages in a directory called _site. If you want to just build the site, type ./go build.
- To see what the site looks like, you can type
./go serve.
This command “builds” the site and gives you an address where you can visit it to see any changes you made. It should be
127.0.0.1:4000, orhttp://localhost:4000for short. You can copy and paste that directly into a browser to double-check. To stop the server, press CTRL + C. If you try to visithttp://localhost:4000after pressing CTRL + C, you won’t see anything.
Congratulations! A lot of the steps that you’ve just done are one time steps. You only have to run the
laptopscript once. You only have to clone the repo once. And you only need to run./go initonce. Just wanted to keep your morale high. Onward!
Create a branch
Okay. Now you’re ready to start editing.
-
Open up a text editor suitable for web development. We use Sublime Text 3, but there are other options like Atom or
vim, but we do not recommend TextEdit or a word processor. -
Now click File -> Open in the menu bar and find your copy of 18f.gsa.gov, which is located in the directory
user/codewhereuseris your username. -
Click on 18f.gsa.gov and click “open.”
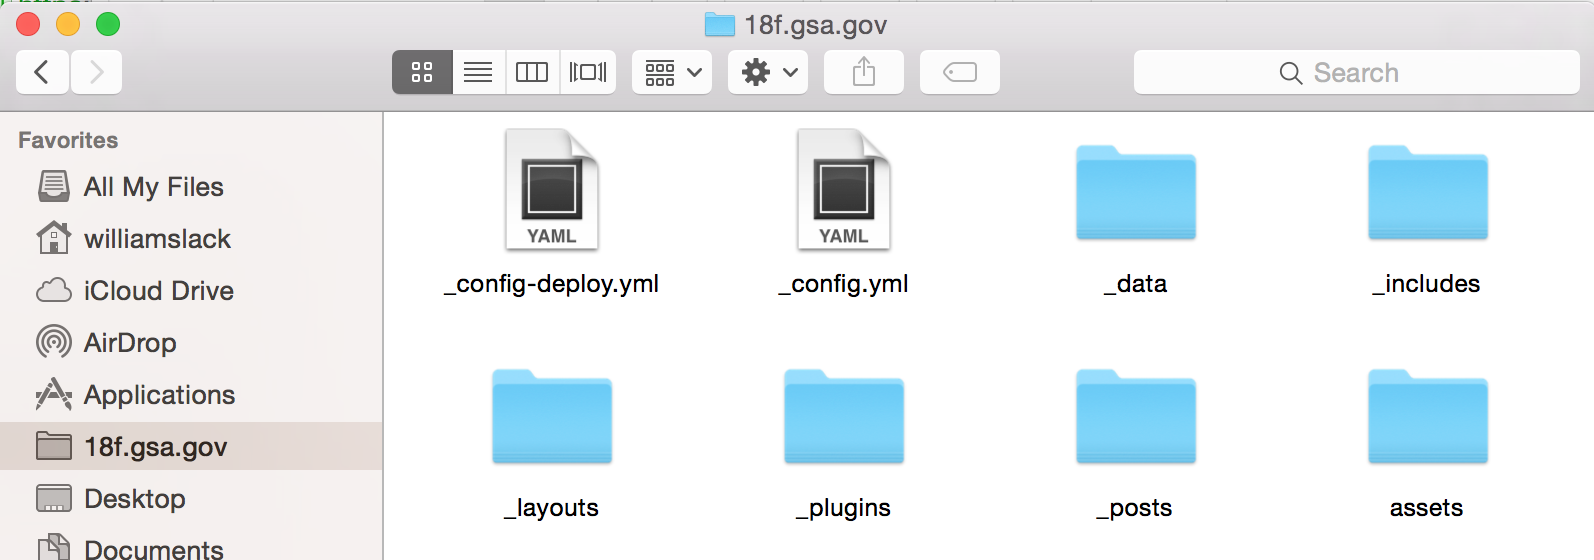
Voila! You can now see all of the files that make up the site. It should look like this.

We now want to create a branch, or a sandbox where you can make changes to the website. On this team we always work on branches. This allows you to collaborate with teammates without interfering with other people’s existing work.
- To create a new branch, type
git checkout -b your-branch-name(The name of the branch can be anything but it should be descriptive.)
The command
git checkouttellsgitto work on a different branch. The-b <branch-name>tells it to create the branch if it does not exist yet. You can switch branches by typinggit checkout branch-name. Try switching back and forth between the branch you just created andstagingto see how this works.
- Type
git statusto make sure you’re now on the branch. You should see something that looks like this:

Edit and commit a blog post
We’re now going to walk you through creating a new blog post for 18f.gsa.gov.
- Type
ls -1Fto see a list of files and folders that make up 18f.gsa.gov’s repo.

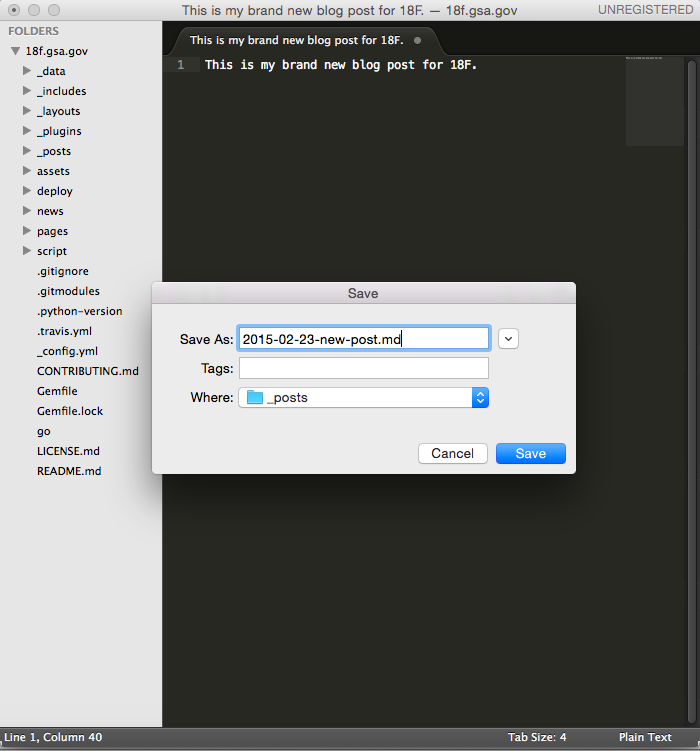
- Go back to Sublime Text and write your post. Then save your post in the
_postsdirectory with the name2015-02-23-new_post.mdwhere ‘2015-02-23’ is today’s date.
Adding front matter
The next step is to add what’s called front matter. This is metadata for the blog post: extra information Jekyll uses to build parts of the website. It includes things like the title, authors, description, and date. You add front matter by pasting in the following fields starting on line 1 of your text editor:
1
2
3
4
5
6
7
8
9
10
11
12
13
14
---
title: "How the 18F website team uses GitHub: a tutorial"
layout: post
author:
- melody
- boone
tags:
- GitHub
- Tutorial
- How We Work
excerpt: "This is a guide that assumes you have no prior knowledge of GitHub or the command line. We're going to introduce you to both GitHub and using the command line through a guided exercise. Today you'll learn how to make a blog post on the 18F blog."
description: "This is a guide that assumes you have no prior knowledge of GitHub or the command line. We're going to introduce you to both GitHub and using the command line through a guided exercise. Today you'll learn how to make a blog post on the 18F blog."
image: /assets/blog/how-to-github/image.jpg
---
A complete explanation for the front-matter can be found on the 18F Blogging Guide. And now you can start writing the text of your blog post on line 16. Say hello! It should look like this:

-
When you are done writing, save the post by pressing Command + S.
-
And then return back to Terminal.
(Don’t worry. You are almost done.)
Learn how to make a pull request
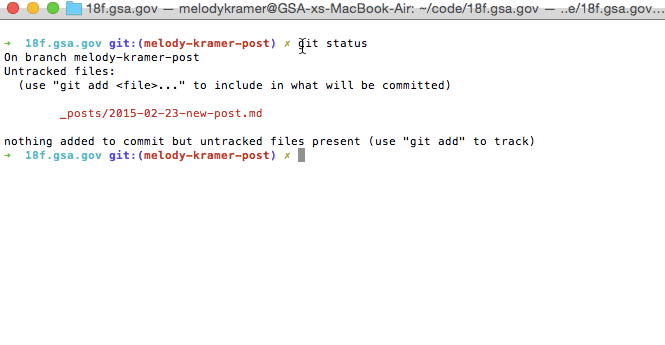
- Type
git statusagain.
You’ll notice that
git statusshows a new section for “untracked files” followed by the name of your blog post. Git has four stages that a file can be in: untracked, modified, staged, and committed. Untracked means git doesn’t know anything about it and will not watch for your changes. Your post is currently untracked and we’re about to move the file through all four stages until it is “committed”.
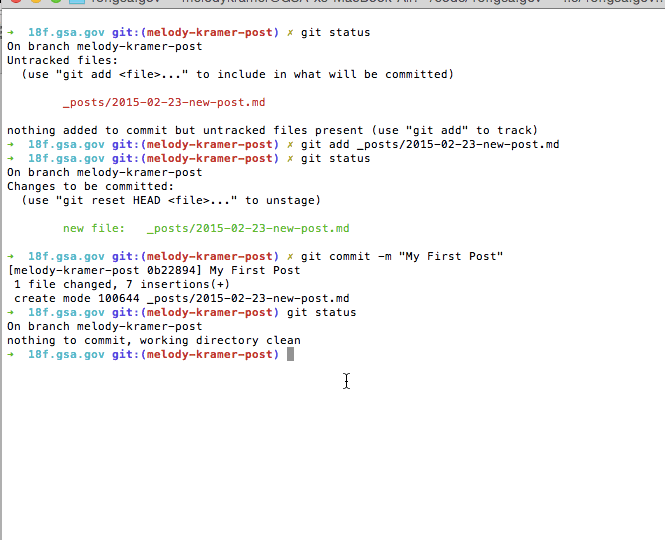
- Type in
git add _posts/2015-02-23-new-post.mdand hit enter. Make sure to type in your actual filename if it has a different date.
This moves the file from untracked to staged. You just told
gitto remember the changes you made to this file. If you make more changes, the file will be “modified” and you will need to run that command again.
- Type
git statusagain.
You’ll see that the file is now listed under changes to be committed.
Well done! At this point, you’ve told Git that this file should be committed, but you haven’t committed anything. So you could work on other things that need to be committed, or you could commit this file right now. We’re going to commit right now.
- Type
git commit -m "My First Post"followed by enter
You will see something that looks like this
1
2
3
[melody-kramer-post 0b22894] My First Post
1 file changed, 7 insertions (+)
create mode 100644 _posts/2015-02-23-new-post.md
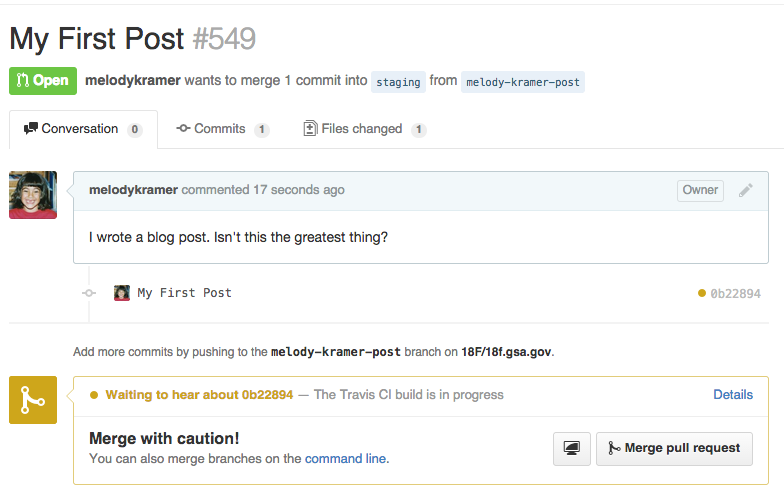
That means one file changed — and it was your blog post! Congrats, you’ve officially committed the file! You’re still at the point where only you can see this file, but it’s now officially been recorded. You’ve recorded the change for yourself and you’re ready to suggest the change to 18F!
- Type in
git statusone more time.
You should see
nothing to commit, working directory clean. That’s because nothing has changed since the last commit.
Note, the following part will work a little differently if you’re not an 18F team member and are working from a fork. We are including them here so you can see what happens when we push the file up to GitHub. The instructions, as they are written here, will work for any repo you own or any of your forks.
- Type
git push origin <branch>(where<branch>is the name you gave your branch) and then hit enter.
This uploads your branch and changes to the 18f.gsa.gov project on GitHub.
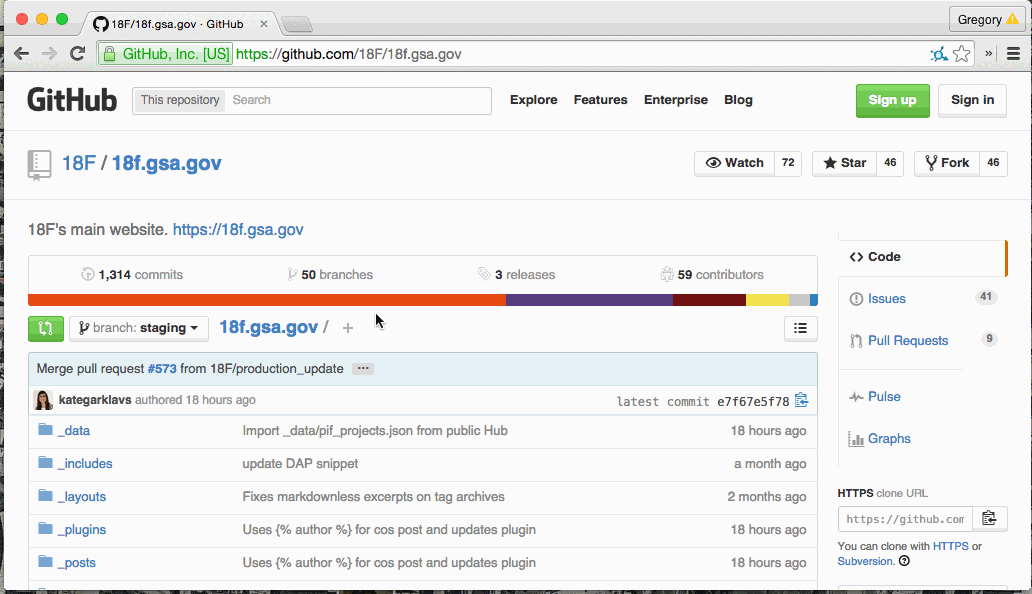
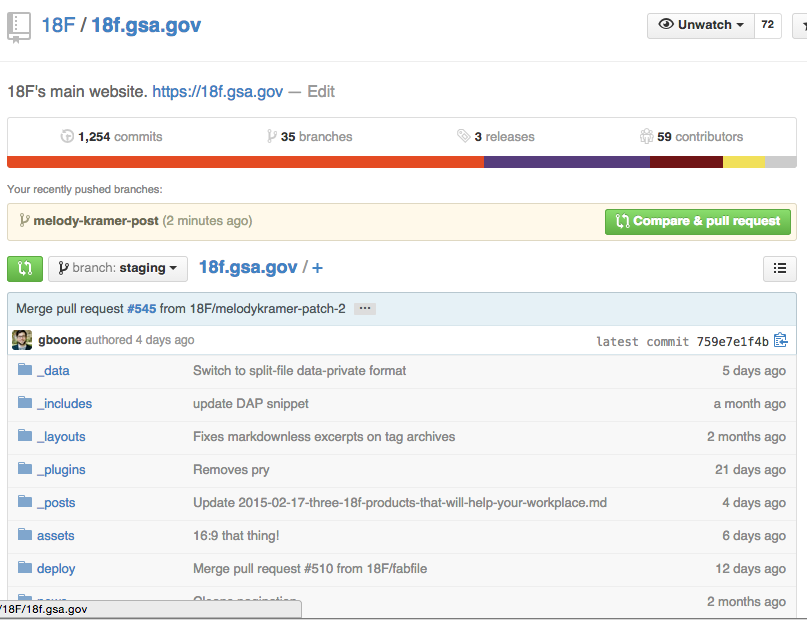
- Now, go back to 18F on GitHub and you should see that you recently pushed a branch.
It will look like this:
- Click
Compare and Pull Request. It’s a big green button.
You can add a little comment like “I wrote a blog post. Isn’t this the greatest thing?”
- Then click
Create Pull Request.
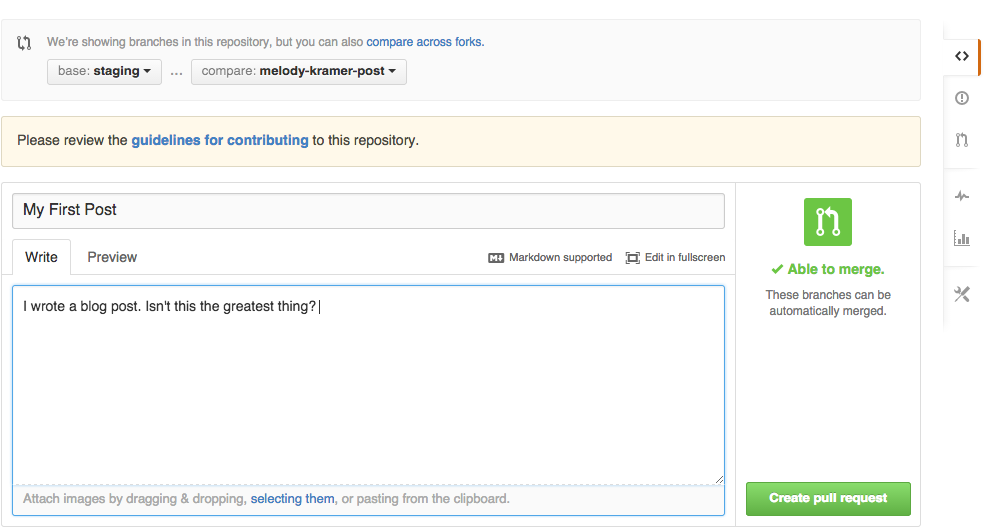
This asks 18F to accept your contribution.
You always want to make sure what’s on your local machine is as up to date as it can be. So whenever you return to the terminal, make the following a habit:
- Type
git checkout stagingfollowed bygit pullagain, to make sure your version of the staging branch is current.

After you type git pull one of two things might happen:
- It will either say “It’s already to up date”
- Or it will start pulling files which keeps your computer up to date. Your computer is downloading only the changes between your computer and GitHub.
Whenever you run git pull you ask GitHub to download the most recent changes. If you get the first message it means nothing has changed since the last time you worked on it. If you get the second, it means someone from the 18F team merged another pull request.
Once you are all up to date, always remember to create a new branch before making any new changes.
If you’d like to make updates to this guide or suggest changes, please add to this issue and we’ll check it out. Thank you!
Moncef Belyamani contributed significantly to this post, helping us shape it and find our mistakes.