
A few of us here recently took a bit of time to drastically rework 18F’s main website and blog — what you’re reading right now — and take it fully into our own hands.
It may not look a lot different on the surface, but we made some serious infrastructure changes. Namely, we migrated the site to Jekyll, and left Tumblr behind by moving the blog inside to join it. We also set up automatic deployment to staging and live sites, using GitHub’s webhook system.
Deploying our blog posts from GitHub instead of managing a separate Tumblr account has drastically simplified our publishing process and opened it up to the whole team. While we still have an approval process for the content of our blog posts, now anyone on the team can hit the Publish button.
To that end, we’ve written a team blogging guide to make the blogging process easier for teammates less familiar with Jekyll.
You can see all of our work in GitHub, but below are more details on how we got this done for anyone interested in trying it out.
Moving to Jekyll
Our site’s first draft was a handful of static HTML pages with lots of copied-and-pasted header and footer boilerplate. Not fun to maintain!
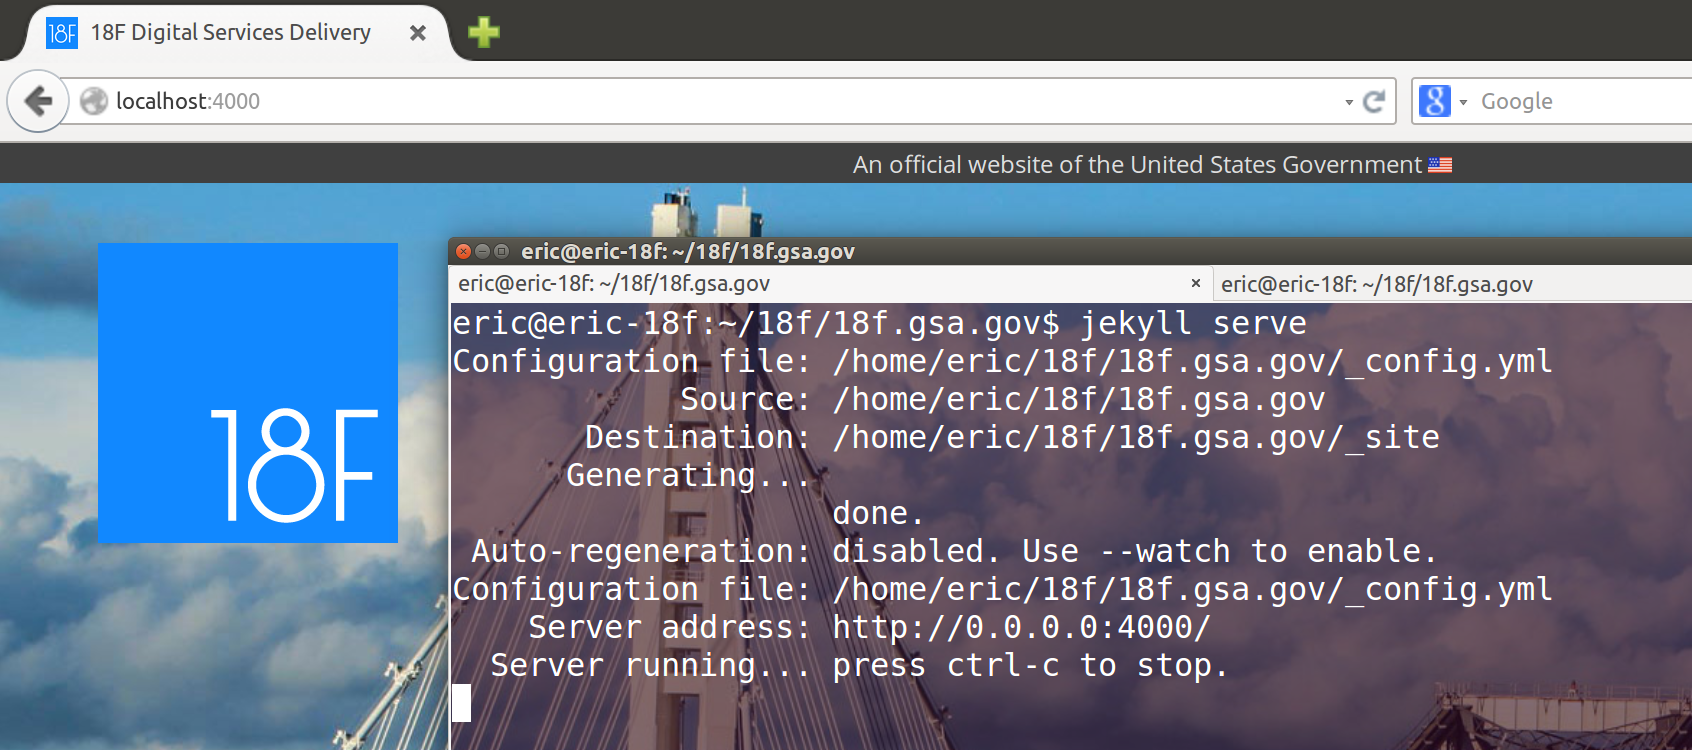
We’ve now moved to Jekyll 2.4, a basic templating system that generates static files when needed. This enables us to use templated layouts and includes for rendering HTML, and plugins to transform content during the rendering process. The resulting static files can be served extremely efficiently.
We also took the time to make data out of our team and turn them all into a YAML file. This lets us render a grid of their faces more easily, even open up a little JSON API1 of our team:
[
  {
    "name": "jamie",
    "full_name": "Jamie Albrecht"
  },
  // ... more teammates ...
}
Jekyll also has some powerful syntax highlighting features, as shown in the JSON snippet above. We use the Redcarpet renderer, which enables the kind of syntax highlighting you get from GitHub Flavored Markdown.
The above snippet is rendered using:
```javascript
[
  {
    "name": "jamie",
    "full_name": "Jamie Albrecht"
  },
  // ... more teammates ...
}
```
For more about the syntax highlighting integration process, see this pull request.
Finally, we moved from Bootstrap to Bourbon.io as our site’s basic CSS framework. This allows us to have more modular Sass-based file structure to our site styles, and makes our site more easily customizable. Bourbon.io also plays nicely with Jekyll’s built-in Sass rendering engine.
Blogging with freedom
Jekyll is a fantastic blog engine so we’ve also ditched our Tumblr blog. We took the old blog and imported it to https://18f.gsa.gov/blog/.
This lets us do all kinds of fun things, such as writing in Markdown. Markdown is a simple text-based markup language designed to be easy for humans to type. For example, a recent post about our EITI design studio is a Markdown file that was written like this:
**Creating user personas.** Based on the participants’ previous research on users,
the group developed [user personas](http://www.usability.gov/how-to-and-tools/methods/personas.html)
to serve as examples of the types of people who would interact with the website.
Jekyll also lets you associate any metadata you want with posts using “YAML front-matter”. At the top of a Markdown file, you put whatever key-value pairs you want to pair with the post. This way, you can keep information about a post together with it and still use it in multiple places (for example, in OpenGraph tags and Twitter cards).
This recent post on an 18F-hosted hackathon is a Markdown file that begins with this metadata:
---
layout: post
title: "18F open source hack series: Midas"
image: /assets/blog/midas-oct-hacking/coding.jpg
description: "We're building the future of government, but we need your help! Join us for a session of coding or UX design. Feel free to come for the afternoon or evening session or both! You can work solo, in pairs or groups that will form when we get there."
excerpt: "18F invites designers and developers from inside and outside of government to join us for a flurry of coding and sketching.  Midas is an open source project in active development by 18F, Health and Human Services (HHS) IDEA Lab and the State Department.  A small cross-agency team, dedicated to launching this product to empower passionate civil servants and aspiring diplomats all over the world."
authors:
- sarah
tags:
- open source
- how we work
- midas
---
Because we’re running Jekyll on our own servers, we can also make our own custom plugins. (While Jekyll works on GitHub Pages, most Jekyll plugins sadly do not.) Since we have our authors captured as data, we wrote a simple plugin to add a lookup filter to our templates using that loops through a data file. (Note: We’ve since rewritten our plugin to generate bylines automatically.)
<p class="authors">
  by {% for author in post.authors %}{{author | lookup:"authors, full_name"}}{% unless forloop.last %}, {%endunless%}{% endfor %}
</p>
Which produces:
<p class="authors">
  by <span class="author chrisc">Chris Cairns</span>, <span class="author mhz">Michelle Hertzfeld</span>, and <span class="author nick">Nick Bristow</span>
</p>
This way, we can update team names in one place and have it automatically update all of their posts. In the future, we can do a lot more, like link each person’s name to their previous posts, or maybe even put little icons next to people’s names. The future is an exciting place.
Finally, we can use Jekyll to generate an RSS feed for our blog so that you can plug it into your feed reader, or into powerful tools like IFTTT and Yahoo Pipes.
Automatic deployment
Even though we’re not using GitHub Pages, we really wanted any changes to show up on our staging and live sites immediately and automatically. Automatic deployment changes team behavior, and makes anyone feel empowered to make changes without going through a bottleneck.
We made this work using GitHub’s webhooks. A free feature, GitHub will notify the URL of your choice whenever various events happen to your repository.
We created two webhooks for our website’s main repository, pointed at our staging and live URLs:
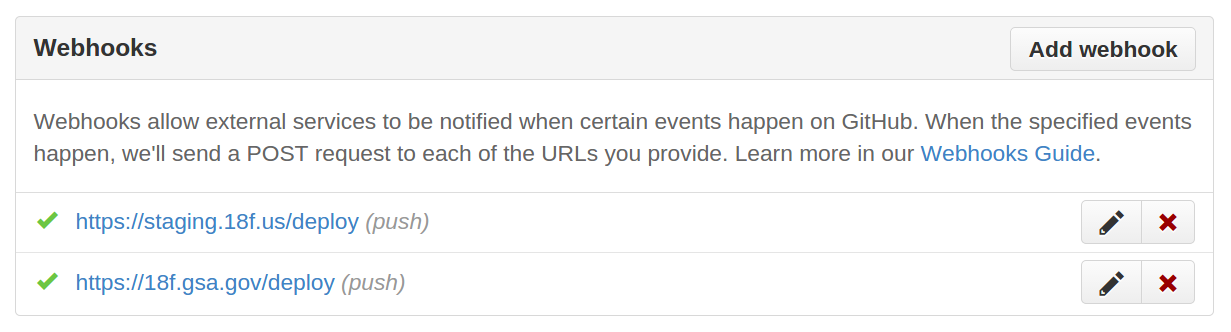
Each is configured to notify the webhook when changes are made to the files in the repository, either directly or through a pull request.
We use a small tool called hookshot, a tiny Node HTTP server that can listen for any updates to a given branch and run a given command. We run two of these, one for our staging branch, and one for our production branch. Each of them is given the command to re-build the site.
We daemonize the webhooks using forever. Starting the webhook process for the staging site looks something like this:
forever start -a deploy/hookshot.js -p 3000 -b staging -c "cd /path/to/18f.gsa.gov && git pull && jekyll build"
These hookshot processes run on the web server, and we make them available for GitHub to speak with through an nginx reverse proxy:
location /deploy {
    proxy_pass http://localhost:3000/;
    # ... more proxy options ...
}
We have our nginx configuration and deploy scripts versioned and documented for anyone who wants to do something similar.
It’s nice to have control
Taken together, these steps greatly simplified our site’s development and deployment, and gave our blog the flexibility of self-publishing. It’s nice to have control, and we hope the details of our work are helpful for anyone interested in doing the same.
-
Since this post was first published, we have eliminated the team.json file that was at one time linked to in this file. ↩